Follow Me!
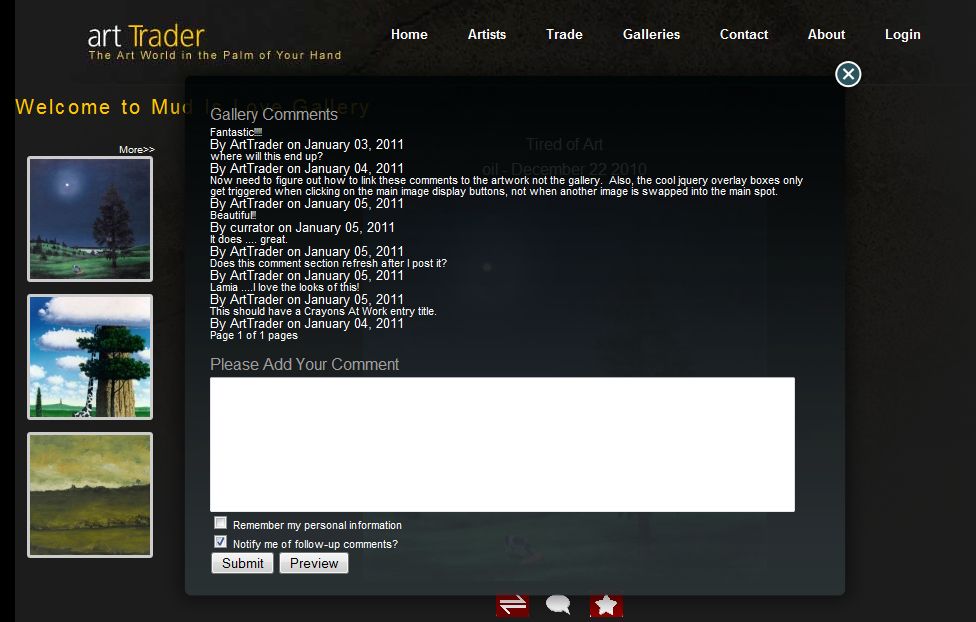
The jQuery tools available for Website development are like a cookbook full of wonderful recipes to try. This one is called Overlay, an element (pop-up box) that overlays the web page that you are currently on. There are three adjustable components to add to your code: a little javascript, some html code for the overlay and the trigger, and then a liberal sprinkling of CSS.
First, select the trigger element (the html a tag) and enable overlaying with a little javascript:
<script>
   $(function() {$(".triggers a[rel]").overlay();});
</script>
Second, define the trigger. My trigger is when the user clicks on my image, comment-bubble.png, the overlay element in the rel attribute is referenced.
<a rel="#comment-box"><img src="{proj_path}/images/comment-bubble.png"/> </a>
Then, add the html code that defines the rel element which as you can see above, is a div named comment-box. This is what will appear in the overlay.
<div id="comment-box" class="apple_overlay black">
this is where you insert all of your code.  my code displayed beholder comments on a particular piece of art on a art website
 </div>
Now some CSS to taste. Define the styling for your overlay.
<style>
.apple_overlay{
              display:none;
              background-image:url("{proj_path}/images/overlay/white.png");
              padding:35px;
              }

/* default close button positioned on upper right corner */
.apple_overlay.close {
                      background-image:url("{proj_path}/images/overlay/close.png");
                      position:absolute; right:5px; top:5px;
                      cursor:pointer;
                      height:35px;
                      width:35px;
                      }

div.apple_overlay.black {
                     background-image:url("{proj_path}/images/overlay/transparent.png");
                     color:#fff;
                     }

</style>
Here’s what it looks like on the site we’re building

Find this tool and more at: http://flowplayer.org/tools
Please Share!
